How is math included?
In a camera there are many settings that need to be changed depending on the lighting, number of subjects, and how fast the subjects are moving. The aperture, also known as f-stop, is the ratio of focal length to effective aperture diameter. The smaller the number of f-stop the larger the diameter of the opening in the lens (as shown in figure 1).
This is something that most have trouble with because it is opposite of what one might think. You would think that the smaller the number the smaller the diameter but that is not the case. To look at the math that is involved in the f-stop we can look at an example. If we have a 50mm lens and we set the f-stop to be f/2 then we would see that it is 1/2 of the length of the focal length of the lens. So, with a 50mm lens at f/2 the actual size of the diameter is 25mm wide. Another way to look at is to understand the area of a circle. You can also figure out how large the opening is by pi(r)^2. The focal length of a lens is really important for the differnet types of photography you are doing. Here in this link below you can see how differnet focal lengths can effect the image.
Focal Lenth lens simulator
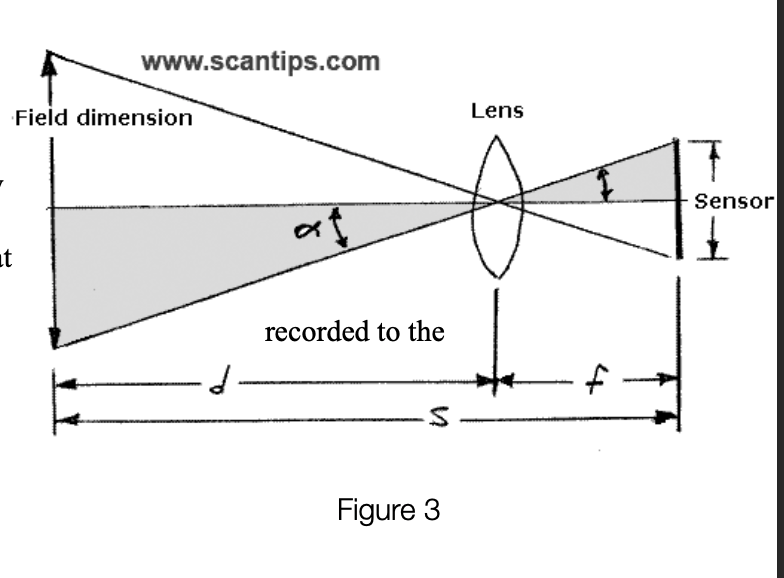
How low the f-stop can go is an important factor in the quality of an image. There are different lenses that can vary in how low the f-stop can go. The lower the f-stop can go the better and more expensive the lens can be. A lower f-stop number can improve images because when you are in a low light situation having a smaller f-stop allows for the shutter to open larger. The larger the opening the more light that the camera will let it. This means that you will be able to get better images in low light. Having a smaller f-stop also allows for the background to be blurred and have the subject be really sharp. The different lenses and different f-stops will offer you different photo qualities and math can help you pick what lens will be best for you. In the figure from scantips.com (Figure 3), we see how a lens refracts an image.
This applet below will be really helful in showing how light refracts through a lens.
How light refracts in a lens
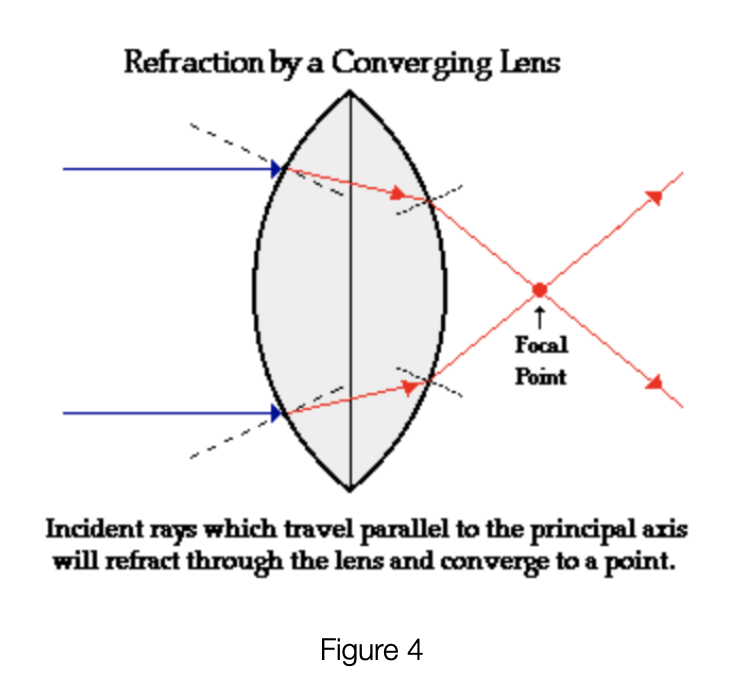
This is a really interesting image on how a photo and light go into a lens. Here we see that an image goes into the lens upside down to the recorded to the censor. After the image is recorded the image must be flipped within the camera in order for it to be upright. In this model we see that there is just one thin lens. In some cameras there are many lenses or one really thick lens. These other lenses are designed to correct distortion in an image and can also help with how much a camera will zoom. A lens in a camera is always refracting light. When the light passes through the lens it will bend as it passes through. This is why cameras have multiple lenses that will help correct the distortion that is caused by the refracting of light. In the diagram from physicsclassroom.com (figure 4) we can see how the light gets refracted.
Depth of field is something that is determined using the f-stop. The depth of field is the distance between the closest object and the furthest object from the camera that is in focus. The formula for depth of field can be found below: The depth of field is very important while taking photos of larger groups. Large groups require a larger depth of field to ensure that all the people will be in focus. If you have too small of a depth of field then not all of the subjects will be in focus and you will get some blurry faces. If you are wanting to get into family or wedding photography it is very important to understand depth of field, how to calculate it, and the settings you would need. Shutter speed is another aspect that plays a part in getting the perfect image. The shutter speed is how long the shutter is opened. You can set the shutter speed anywhere from a few seconds all the way down to 1/8000 of a second. The faster the shutter speed the less light it will let into the camera, but it will also be able to capture faster movements. If you have a slower shutter speed it will let in more light but your subjects will also need to be able to hold still in order to get a clean image. You can see this clearly displayed in figure 5.
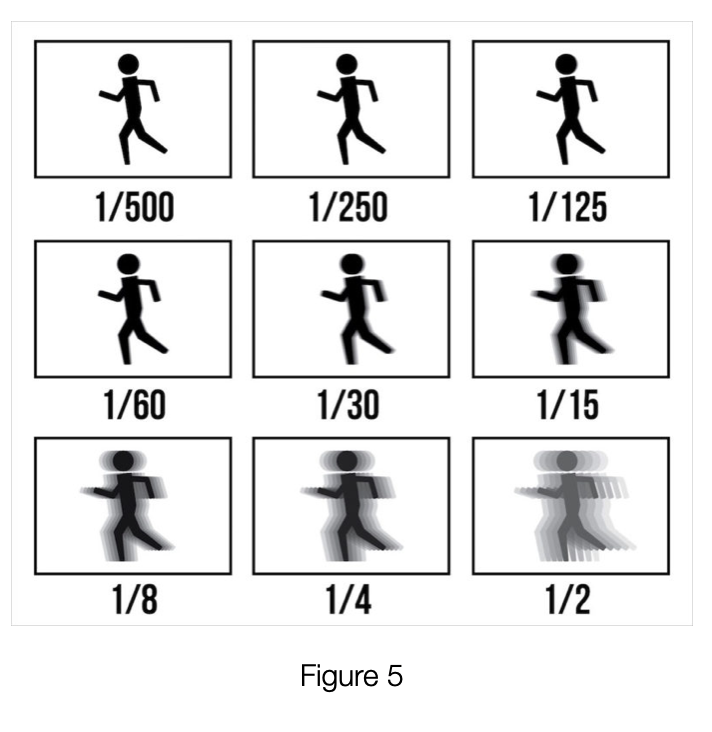
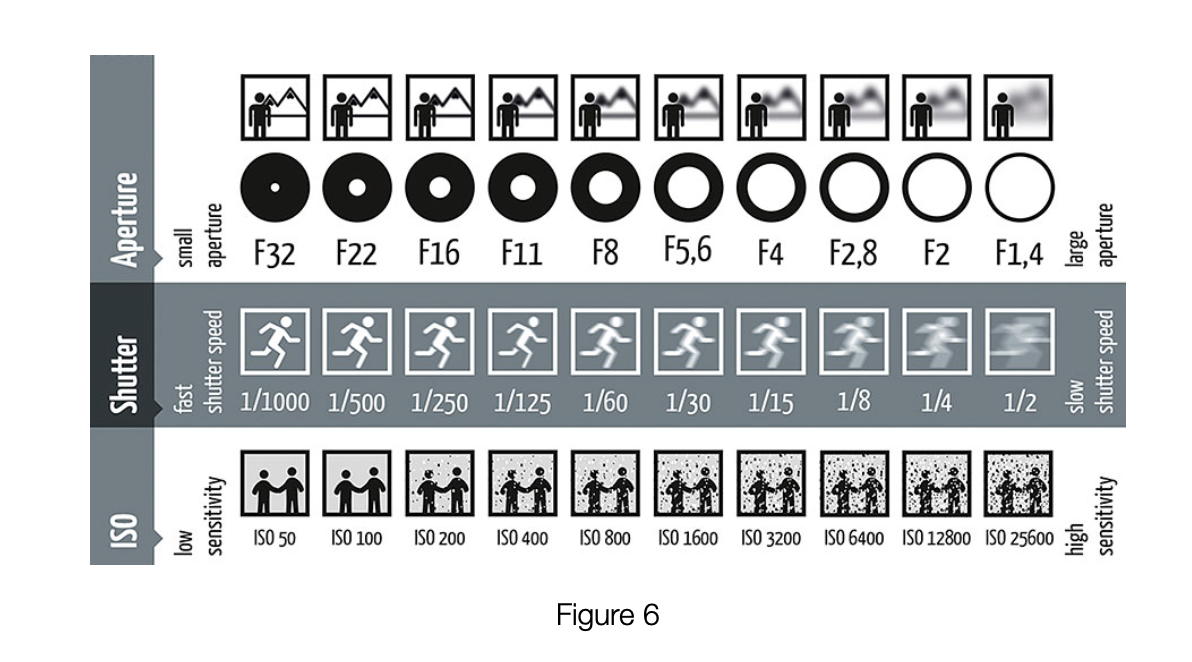
To understand shutter speed you need to understand the geometric sequence. If you start with a shutter speed of 1/1000 and slow it down to 1 second, every interval that you slow down it multiplies the light that enters the camera by a factor of 2. Another factor is ISO. ISO consists on the scale 50, 100, 200, 400, 800, 1600, 3200, and 6400. The ISO has to deal with how sensitive the camera is to the light. All of these factors come together to make the perfect image. You need to be able to understand the math behind the settings in order to master getting the correct settings for every scenario. All of these variables come together to create the right lighting and focus for an image in different lighting and different subject types and lengths. As shown in figure 6, you will see a chart that shows how all the variables work together in the different light.
I think that this applet below is so cool and fun to play around with. You can really see how each setting changes an image.
Camera simulation